The last couple of weeks haven't been too great on my plants and consequently, a few of them have suffered. With the transfer back to a single system, I caused a little too much stress to some of my plants. The DWC strawberry suffered the worst, it never really established new roots after my multiple transplants, and it eventually developed spider mites. And then I caused even more stress trying to get rid of the mites, and now, well, it's spot has been filled with big cabbage from our garden that we decided wouldn't get to producing in time before winter. Also, we had a some issues with the needle on the pump clogging with sediment from the nutrients, so the plants had a few instances of dehydration, the tomato in all of it's colossal glory was hit hardest, browning at the extremities. And then I noticed last time I was home that it had acquired the mites from the strawberry, so extensively that we decided it best to remove it to save the younger, more fruitful plants, and my dad's soil tomatoes (I guess he will be winning our soil v. hydro tomato competition this time around, haha). And while the size and stability of the plants was impressive for the longest time, it did use an unnerving quantity of water, and being at the top of the tower, we were unable to have anything under it, for fear of drought. And the way I had contorted it to be supported it nearly blanketed the tower on all sides.
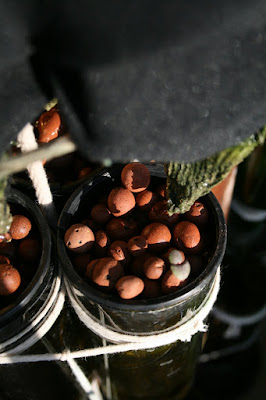
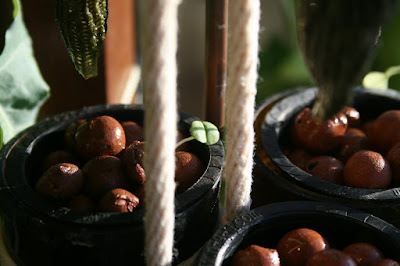
So, goodbye tomato, you were my first, and you put in a good run. But hey, on the plus side, your roots look really cool out of the bottle!
Along with the tomato, the basil has seen better days. After the most recent cropping, it isn't quite bouncing back like it had, being a little light choked from the tomato's dangling. So we are planning on removing that as well.
On the plus side, all three assorted peppers are doing good! The bell is ripe, albeit the fruit is a little small, but the plant is on the inner side of the tower, and the tomato was being a little fascist with the resources. And the jalapeños are hanging in there, they got some slight spider mites, but they are small enough we could fix it. They are flowering like it's their job though, and now that the sun has sank on the horizon, they will hopefully get the light they deserve and produce some full fruit (they were starting to fruit when I was there).
In other news, I have brought the other farm back into serviceable condition (the needle had clogged with sediment, so I replaced it with a fresh one)! And will be getting it going soon. We have seedlings popping up every day now, a wide assortment of things, including replacement basil (green and purple), lettuce, peas, green beans, eggplant, and even watermelon! I had planned on setting the farm up in my dorm room, but realize that that would just be a lot of work for no good reason, because my window gets iffy light for a couple hours in the morning right now. So I am establishing the farm at home over the next couple months, and will be bringing it with me to my new apartment in January. I will finally have a kitchen to cook and minimal time to work due to my full time student teaching, so I will be supplementing mine and my roommates grocery list with some fresh, all organic, really local veggies.
Also, in the next week or so I will be helping my friend (whom exposed me to the WindowFarms Project through a youtube video she had StumbledUpon) get a farm going in her apartment! We assembled the system weeks ago, same construction as the farm from the "My Newest WindowFarm" post. Modification is primarily that the needle is inserted from the mouth of the bottle rather than how I did it initially, so there won't be pumping issues. Otherwise it is the same. We had the bottles pre-cut, some left over from my prior incarnations, we chose nine of the twelve to use. From sanding edges smooth to hanging the system, the whole process took approximately 4-5 hours with two sets of hands. Due to school distractions and workload, as well as being in the city in the winter, it took a little bit of time for her to find seeds and then germination took an awkwardly long time to happen, but as of seeing her last they had started popping up and as soon as I have more than five minutes free outside of work, class, and projects I am going to help them get the seedlings into the system. I made her a collaborator on this blog too, so hopefully once the whole thing is established she will add some posts of her escapades.
So keep posted, between the changes in the farm I built for my parents, the reincarnation of my farm, the development of my friend's farm, and some ideas that have been jostling around my noggin during this month of work overload, there will be some more busyness for all of you wonderful readers out there to put on your palette in the coming weeks.
And please, if you guys have any input at all, comments, critiques, suggestions, requests, anything at all, do not hesitate to comment on the posts. The biggest innovations always come from multiple points of view, and my farm has only become what it is because of my friends' and family's idea bouncing, and the wonderful information and discussions on our.windowfarms.org. So, any input will be thoroughly taken to heart.
Namaste, and Keep Farmin'